# Get the program
Clone xiaomlove/nexusphp (opens new window) and switch to the latest release tab before installing it, or just download the latest release (opens new window).
WARNING
Be sure to switch to a release for installation when cloning. Do not use the latest development code!
# Create a database
First login to Mysql, create a new database, and choose utf8 + utf8_general_ci or utf8mb4 + utf8mb4_general_ci for the charset and sorting rules (collate). The latter supports storing emoji expressions, the former does not.
mysql> create database `nexusphp` default charset=utf8mb4 collate utf8mb4_general_ci;
Query OK, 1 row affected (0.06 sec)
TIP
utf8mb4 requires Mysql 5.5.3 or above to be supported.
# Configure the web server
# Do not enable https configuration
In the case of nginx, only the most basic configuration is required. Add a new nexusphp.conf to the nginx configuration directory (usually /etc/nginx/conf.d/)
server {

    # whichever is more appropriate
    root /RUN_PATH;

    server_name DOMAIN;

    location / {
        index index.html index.php;
        try_files $uri $uri/ /nexus.php$is_args$args;
    }

    # Filament
    location ^~ /filament {
        try_files $uri $uri/ /nexus.php$is_args$args;
    }

    location ~ \.php {
        # whichever is true
        fastcgi_pass 127.0.0.1:9000;
        fastcgi_param SCRIPT_FILENAME $document_root$fastcgi_script_name;
        include fastcgi_params;
    }

    access_log /var/log/nginx/DOMAIN.access.log;
    error_log /var/log/nginx/DOMAIN.error.log;
}
# Enable https configuration
To enable https, you first have to prepare the certificate, see [About https] below.
server {
    listen 443 ssl;
    ssl_certificate /SOME/PATH/DOMAIN.pem;
    ssl_certificate_key /SOME/PATH/DOMAIN.key;

    # whichever is true
    root /RUN_PATH;

    server_name DOMAIN;

    location / {
        index index.html index.php;
        try_files $uri $uri/ /nexus.php$is_args$args;
    }

    # Filament
    location ^~ /filament {
        try_files $uri $uri/ /nexus.php$is_args$args;
    }

    location ~ \.php {
        # whichever is true
        fastcgi_pass 127.0.0.1:9000;
        fastcgi_param SCRIPT_FILENAME $document_root$fastcgi_script_name;
        include fastcgi_params;
    }

    access_log /var/log/nginx/DOMAIN.access.log;
    error_log /var/log/nginx/DOMAIN.error.log;
}
# http jump https
server {
    if ($host = DOMAIN) {
        return 301 https://$host$request_uri;
    }
    server_name DOMAIN;
    listen 80;
    return 404;
}
After adding, nginx -t test for errors, no errors nginx -s reload restart to take effect.
TIP
If it's a BT panel, make sure the following functions are not disabled: symlink, putenv, proc_open, proc_get_status, exec, pcntl_signal, pcntl_alarm, pcntl_async_signals. Do not check: prevent cross-site attacks (open_basedir).
After the BT is created site well and add the following to the configuration file.
location / {
    index index.html index.php;
    try_files $uri $uri/ /nexus.php$is_args$args;
}

# Filament
location ^~ /filament {
    try_files $uri $uri/ /nexus.php$is_args$args;
}
# Procedure
# Installation preparation
The following is executed under ROOT_PATH.
composer install, install the dependenciescp -R nexus/Install/install public/, copynexus/Install/installtopublic/, make surepublic/install/install.phpis there at the endchown -R PHP_USER:PHP_USER ROOT_PATH, set the root directory owner to the user running PHP- In the above step, if you don't know who PHP_USER is, you can also give the entire directory 0777 permissions:
chmod -R 0777 ROOT_PATH
After the above preparations are done, open the website domain and the installation screen will jump normally.
# Execute the installation
Fill in each step according to the actual situation, pay attention to choose the right time zone, otherwise the time is not correct, more likely the client can not report. Click Next until you are done.
# Generates encryption keys for Passport
Goto the web root path, then execute the command below:
php artisan passport:keys
# Create background task
------Manual users look here------
Create a timed task for user PHP_USER, execute: crontab -u PHP_USER -e, and enter the following in the opened interface.
* * * * * cd ROOT_PATH && php artisan schedule:run >> /tmp/schedule_DOMAIN.log
* * * * * cd ROOT_PATH && php include/cleanup_cli.php >> /tmp/cleanup_cli_DOMAIN.log
If it doesn't work, check to see if there is a crontab file under /etc, and if so, edit it there as well
* * * * * PHP_USER cd ROOT_PATH && php artisan schedule:run >> /tmp/schedule_DOMAIN.log
* * * * * PHP_USER cd ROOT_PATH && php include/cleanup_cli.php >> /tmp/cleanup_cli_DOMAIN.log
You can determine if the redirect file is in effect by checking to see if there is content output.
------BT panel users look here, the upper side does not need to do------
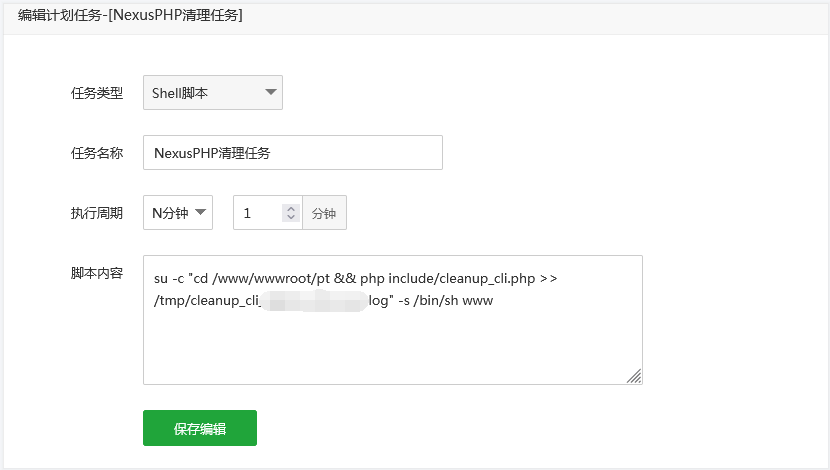
If it is a BT panel, create two scheduled tasks with the following script (remember to replace DOMAIN with your own domain name).
su -c "cd /www/wwwroot/DOMAIN && php include/cleanup_cli.php >> /tmp/cleanup_cli_DOMAIN.log" -s /bin/sh www

su -c "cd /www/wwwroot/DOMAIN && php artisan schedule:run >> /tmp/schedule_DOMAIN.log" -s /bin/sh www
One of the examples is as follows (note that it is configured 2, a task with one of the lines, not a task to write 2 lines.):
DANGER
Special reminder: the implementation cycle is every minute, can not be modified! Here the configuration is only an entrance, the actual frequency of operation is program control, modify the frequency of the entire site does not run properly! For example, the bonus will not increase as expected!
When finished, delete the public/install directory. The installation logs contain sensitive data and should not be leaked.
# Create queue daemon (>=1.8 required)
------ manual users look here ------
After installing the supervisor, add a new configuration file nexus-queue.conf to its configuration directory (usually /etc/supervisor/conf.d/), Note that you replace ROOT_PATH, PHP_USER, where numprocs is the number of processes started, usually the number of your own CPU cores is the number of CPU cores you have.
[program:nexus-queue]
process_name=%(program_name)s_%(process_num)02d
command=php ROOT_PATH/artisan queue:work --tries=3 --max-time=3600
autostart=true
autorestart=true
stopasgroup=true
killasgroup=true
user=PHP_USER
numprocs=2
redirect_stderr=true
stopwaitsecs=3600
stdout_logfile=/tmp/nexus-queue.log
TIP
For versions 1.9 and above, use horizon instead of queue:work.
[program:nexus-queue]
process_name=%(program_name)s_%(process_num)02d
command=php ROOT_PATH/artisan horizon
autostart=true
autorestart=true
stopasgroup=true
killasgroup=true
user=PHP_USER
redirect_stderr=true
stopwaitsecs=3600
stdout_logfile=/tmp/nexus-queue.log
After saving it, execute the following command to start it:
# Start
supervisord -c /etc/supervisor/supervisord.conf

# Reread the configuration file
supervisorctl reread

# Update the process group
supervisorctl update

# Start
supervisorctl start nexus-queue:*
------ BT panel users look here, the top ones don't need to do ------
Store install Supervisor Manager, click add daemon, fill in the following format (Note replace ROOT_PATH, PHP_USER):
Name: nexus-queue
Startup user: PHP_USER
Running directory: ROOT_PATH
Start command: php ROOT_PATH/artisan queue:work --tries=3 --max-time=3600
Number of processes: 2
# Troubleshooting
If you cannot jump to the installation screen properly, check the nginx error log.
If you do not see errors, php-fpm errors may not be output to the nginx error log. Open www.conf (try whereis php-fpm if you don't know where, you can see the base directory), find catch_workers_out and php_admin_flag[log_ errors], make sure they are open.
Restart php-fpm and the changes will take effect.
catch_workers_out = yes
php_admin_flag[log_errors] = on
If you still don't see the errors, change include/core.php to show the errors on the page by changing 0 to 1 at about line 18.
ini_set('display_errors', 1);
DANGER
After fixing the error, remember to turn off the error display!
# Other
# About https
It is recommended to use cloudflare's DNS resolution service, which provides free ssl certificates. Under the SSL/TLS menu, select Full or Strict encryption mode, create the certificate under the [Source Server] submenu, save and upload it to the source server, and configure it as described in the above document.